
Swirl marks are often the first sign that your car’s flawless finish is under threat. You’ve just brought home a new car, or maybe you’re trying to preserve the one you love. You wash it carefully every weekend, but a few months later, you notice a fine web of circular scratches shimmering in the sunlight. You’re not alone—an alarming 95% of new cars show swirl marks and fine scratches before they even reach their first real owner, and over 65% of drivers notice new scratches within the first year.
The culprit isn’t necessarily a rogue shopping cart or a tight parking spot. The hard truth is that most paint damage comes from good intentions gone wrong: the weekly car wash. Research from the University of Texas is sobering—a single improper home hand wash can inflict scratches as deep as 1/10th of your paint’s total thickness.
You’re now at a crossroads. You can continue down a path that leads to expensive paint correction—a process that can cost anywhere from $500 to over $2,500—or you can adopt a professional, preventative mindset. This guide is your roadmap to the second path. We’ll break down the science of safe washing, transforming your routine from a source of damage into your car’s best defense.
The Microscopic Battle on Your Paint: Understanding Swirl Marks
Before you can prevent swirl marks, you need to understand what they truly are. They aren’t caused by washing in circles, as the name suggests. A swirl mark is a cluster of thousands of microscopic scratches in your vehicle’s clear coat. When sunlight hits these tiny, jagged grooves, it refracts and scatters, creating the web-like pattern we see.
Think of your wash mitt moving across the car. If it’s holding onto a particle of dirt or grit, it’s no longer a soft cleaning tool. It becomes a piece of fine-grit sandpaper, dragging that abrasive particle across the surface and carving a tiny trench into your clear coat. Do this hundreds of times over a single wash, and you’ve created a network of damage. The goal of a safe wash isn’t just to remove dirt—it’s to do so with the absolute minimum amount of friction and contact.
Phase 1: The Pre-Wash — Your First Line of Defense
The single most important step you can add to your routine is the pre-wash. This is the non-contact stage designed to loosen, lift, and remove the majority of dirt and grime before your wash mitt ever touches the paint. Skipping this is like trying to wipe a muddy floor with a dry paper towel—you’re just grinding the abrasive dirt into the surface.
The Foam Cannon Deep Dive: Engineering a Safer Wash
The most effective pre-wash tool is the foam cannon. It’s not just for show; it’s a feat of fluid dynamics. Using pressure (typically 800-5,000 PSI) and air injection, it transforms a mixture of car soap and water into a thick, clinging foam. This foam does two critical jobs:
- Encapsulation: The surfactants in the soap surround and encapsulate dirt particles, breaking their bond with the paint.
- Lubrication: As gravity pulls the foam down the vehicle, it carries the loosened dirt with it, all while providing a slippery layer that prepares the surface for a safe contact wash.
How to Use a Foam Cannon Effectively?
- Mix Your Solution: Follow your soap’s recommended dilution ratio for a foam cannon. Too little soap won’t be effective; too much is wasteful.
- Apply to a Dry Car: For the heaviest dirt, apply foam to a dry surface. Water can create a barrier that dilutes the foam’s cleaning power.
- Work From the Bottom Up: Start applying foam to the lower panels and work your way up. This prevents the foam from running down clean panels too quickly and ensures maximum dwell time where dirt is heaviest.
- Let it Dwell: Allow the foam to sit for 5-10 minutes, but don’t let it dry on the surface. You should see it actively lifting dirt as it drips off the car.
- Rinse Thoroughly: Using a pressure washer, rinse from the top down, washing away the foam and the vast majority of the grit with it.
No Foam Cannon? No Problem.
If you don’t have a pressure washer and foam cannon, you can still perform an effective pre-wash. Use a pump sprayer or a hose-end foamer with a quality pre-wash solution to soak the car before rinsing it thoroughly. The goal remains the same: get as much dirt off as possible without touching the paint.
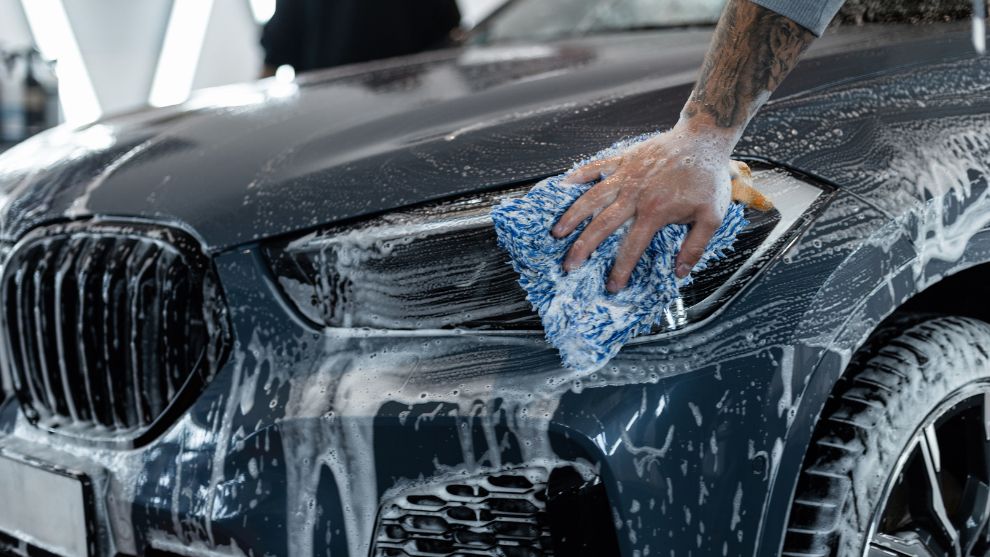
Phase 2: The Contact Wash — The Two-Bucket Method Perfected
With 80-90% of the grit gone, it’s time for a gentle contact wash. The gold standard here is the two-bucket method. It’s a simple concept that dramatically reduces the risk of inflicting swirl marks.
Why Two Buckets Are Better Than One?
- Wash Bucket: Filled with your pH-neutral car soap solution.
- Rinse Bucket: Filled with plain water.
Both buckets should have a Grit Guard at the bottom—a plastic insert that traps grit at the base of the bucket, preventing your mitt from picking it back up.
The process is methodical:
- Load your mitt with soapy water from the Wash Bucket.
- Gently wash a single panel, like a door or half the hood.
- Before getting more soap, dunk and agitate the dirty mitt in the Rinse Bucket. Rub it against the Grit Guard to release trapped dirt.
- Wring out the mitt, then return to the Wash Bucket for fresh, clean soap.
- Repeat for the next panel.
This ensures you’re never dragging dirt from the rocker panels all over your hood. You’re isolating the contaminants and only touching the paint with a clean, lubricated mitt.
Choosing Your Tools: The Right Soap and Mitt
- Soap: Always use a pH-neutral car soap. Harsh cleaners like dish soap have a high pH and are designed to strip everything, including the essential waxes, sealants, or ceramic coatings protecting your paint. A pH-neutral soap effectively cleans while preserving that protective layer, maintaining its hydrophobic properties for months or even years. When you’re choosing the right car care products, this is a non-negotiable.
- Wash Mitt: Ditch the old sponges and towels. A high-quality chenille microfiber or merino wool wash mitt is essential. Its long, soft fibers pull dirt particles deep within the mitt, away from the paint surface, minimizing the chance of scratching.
Phase 3: Rinsing & Drying — The Final Step to a Flawless Finish
You’ve done the hard work of washing safely; don’t ruin it in the final step. Improper drying is one of the biggest causes of swirl marks. The goal is to remove water with minimal friction.
Smart Rinsing and Drying Techniques
- Sheeting Rinse: For your final rinse, take the nozzle off your hose and let a gentle stream of water flow over the car from top to bottom. The surface tension will pull the majority of the water off in “sheets,” leaving very little behind to dry.
- Blot, Don’t Wipe: Use a high-quality, dedicated microfiber drying towel. These towels are incredibly absorbent—some can hold 7 times their weight in water. Instead of wiping or rubbing, use the pat-and-lift or blotting method. Lay the towel over a section, gently pat it, and lift it off.
- Use a Drying Aid: A drying aid is a spray that adds lubrication to the surface as you dry. It helps the towel glide effortlessly and can add a layer of gloss or hydrophobic protection.
- Go Touchless with Air: The safest method of all is a car blower or leaf blower. It uses filtered, high-velocity air to push water off the surface, resulting in a 100% touch-free dry.
The Hidden Enemy: Hard Water
If you live in an area with hard water, you’re fighting another battle: mineral deposits. Calcium and magnesium left behind after water evaporates can cause stubborn spots and even etch into your clear coat. If this is your situation, consider using a filtered water system for your final rinse or exploring high-quality rinseless wash products.
Common Car Wash Myths That Are Ruining Your Paint
- Myth: Dish soap is cheap and effective.
- Fact: It’s a degreaser that strips all waxes and sealants, leaving your paint unprotected and vulnerable.
- Myth: Automatic car washes are convenient and safe.
- Fact: Many use abrasive spinning brushes that are full of grit from hundreds of other cars, effectively sandblasting your finish. For those who value their vehicle’s finish, our professional hand wash services are built on the safe, meticulous principles outlined here.
- Myth: A Magic Eraser or WD-40 can fix minor scratches.
- Fact: A Magic Eraser is a micro-abrasive that dulls your clear coat. WD-40 is an oil that merely fills the scratch temporarily; it does nothing to fix it and will wash away.
Frequently Asked Questions (FAQ)
Q1. How often should I wash my car using this method?
For a daily driver, washing every one to two weeks is ideal. This prevents the heavy buildup of contaminants that can bond to your paint and require more aggressive cleaning.
Q2. Is a foam cannon really necessary?
While not strictly necessary, it is the single most effective tool for a safe pre-wash. It dramatically reduces the amount of dirt on the car before you make physical contact, which is the primary goal of scratch prevention.
Q3. What’s the difference between a wax, sealant, and ceramic coating?
All are forms of paint protection. Wax is a natural, temporary layer that offers gloss and protection for weeks. A sealant is a synthetic polymer that bonds to the paint, lasting for months. A ceramic coating is a liquid polymer that forms a semi-permanent, hard chemical bond with the paint, offering years of protection. Safe washing is crucial for preserving all three.
Q4. Can this method fix existing swirl marks?
No. This method is for prevention. Once swirl marks are present, they are physically etched into the paint. The only way to remove them is through paint correction (polishing), which carefully levels the clear coat to remove the scratches.
The Smart Investment: Prevention Over Correction
Mastering the art of a safe car wash is an investment in your vehicle’s value, appearance, and longevity. The time and effort spent using the right techniques and products are minuscule compared to the hundreds or thousands of dollars required to correct the damage caused by just a few improper washes.
Whether you’re a dedicated DIY enthusiast or someone who prefers to trust the experts, these principles are the foundation of proper car care. At Mr. Shine, our entire hand wash process is built around this philosophy of meticulous, contact-minimizing care. If you want to ensure your vehicle gets this level of attention every time, explore our unlimited hand wash memberships and let our team protect your investment for you.

